
How to Use Signority with Microsoft SharePoint and Microsoft 365
Signority's integration with Microsoft SharePoint and Microsoft 365 allows you to send documents directly from Microsoft to Signority for signing. Signed files will then be automatically saved into the same location as the original files. To take advantage of this feature, make sure that your company has set up and enabled the integration. For setup instructions, refer to the Microsoft SharePoint and Microsoft 365 Integration Setup Guide.Steps to Send a Document for Signing from SharePoint
- Log into your Microsoft 365 account and locate the document(s) you want to sign.
- In the top menu bar, find the SignorityHandler option (you may need to select More options or … if it is not immediately visible), then select Sign with Signority.
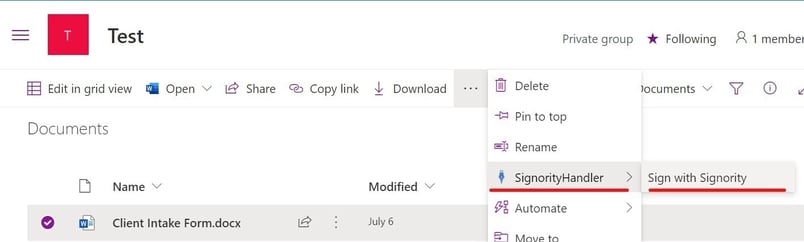
You will be taken directly to Signority's document editor page, where you can prepare the document(s) you selected for signing. From here, the sending and signing process is very similar to that of a regular document.
Once the document has been finalized, its PDF version will be saved in the same place as where the original document came from.
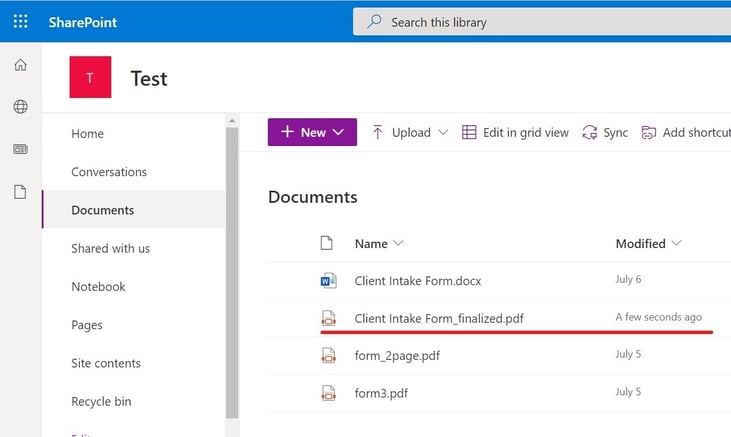
That's how you use the Signority integration with Microsoft SharePoint and Microsoft 365 to send documents for signing.
For more details, check out our video tutorial: