
Available with:
Custom Plans
Encrypted Stamps allow a designated recipient to apply a password-protected organizational seal to a document on behalf of your organization's department. This article explains how to set up an Encrypted Stamp, add it to a document or template, and apply it.
How do you set up an encrypted stamp?
Role(s): Team Admin, Super Admin- Navigate to the Admin Console
- In the left side menu select Settings > Stamps.
- Select the Add New button at the top right of the page.
- On the pop-up select Encrypted Stamp.
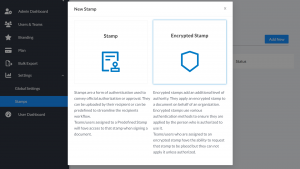
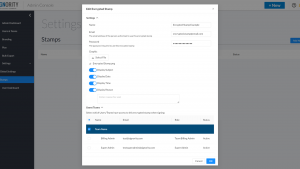
- Enter the following details:
-
- Name: Name of the electronic seal
- Email: The email of the person (signer) who can apply the electronic seal on to the document
- Password: The signer will require this password to apply the seal.
- Graphic:
- File: PNG or JPEG of the electronic seal
- Display Subject: Seal Name
- Display Date: Date that the seal is applied
- Display Time: Time that the seal is applied
- Display Reason: Reason for seal being applied
- Users/Teams: Select the users/teams that can request that an electronic seal be applied to their documents. You may select either an individual or a team. If you select a team you do not have to select the individuals within the team. Note: When you select a team, the whole team will have the ability to request an eSeal, even though the box beside each team member is not checked.
-
- Click OK when you are done.
How do you add an encrypted stamp to a document or template?
- Begin by creating a new document, then upload your documents or go straight to the add recipients page.
- On the recipient's page, add the recipients for your document.
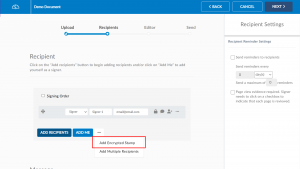
- Add the encrypted stamp recipient by clicking the Ellipses button next to Add Me and select Add Encrypted Stamp.
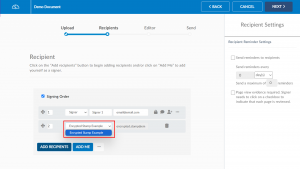
- On the new recipient that was added, select which encrypted stamp you wish to request from the dropdown.
- Add the rest of your recipients and then click next to proceed to the document editor page.
- Select the encrypted stamp recipient on the left menu, and the Encrypted Stamp tag will appear as an option under 'Tags' on the left menu.
- Drag and drop the Encrypted Stamp onto your document.
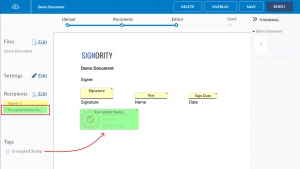 Note: An overlay of the Encrypted Stamp will appear to show how the seal will look once it is applied.
- Finish setting up your document and then click Send.
How do you apply an encrypted stamp to a document?
To apply an Encrypted Stamp, open the email notification sent to the stamp recipient's address and click the link to access the document. Enter the stamp password when prompted, agree to the terms of use, select the encrypted stamp tag, and click Finish.
- Open the email notification sent to the encrypted stamp recipient's email address and click the link to open the document.
- On the "Document for your Secure Access" popup, enter the password for the encrypted stamp.
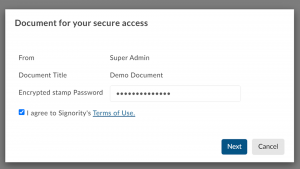
- Agree to the terms of use and click OK.
- Select the encrypted stamp tag to place the stamp.
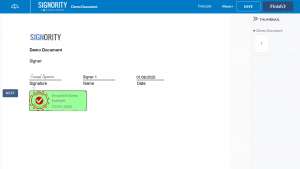
- Click Finish.