Personalize the subject line and message content of your invitation emails to give signers helpful context and increase the chances your email gets noticed and opened.
Customization can apply to all recipients on a document, or to individual signers using a private message.
Looking for organization-wide defaults? See Setting Up Email Branding to configure default email content across your whole organization.
Need to message a specific signer? See Adding Private Messages for Specific Signers to override the general message for an individual recipient.
Custom Invitation Email for All Recipients
You can customize the subject line and message for all recipients from either the Recipients page or the Document Editor, depending on how you start your document.
When Creating a New Document (Recipients Page)
When creating a new document, you can customize the invitation email on the recipients page. If you missed this step or want to make any changes later in the workflow, you can do so in the document editor.
- Click +New on the Dashboard to create a new document.
- Upload your files or click Next to skip to the recipients page.
- On the Recipients page, find the Invitation Email section on the panel on the right side.
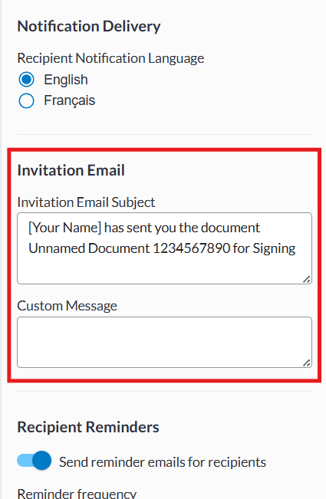
- Edit the Subject Line and Message fields to your liking.
When Setting up a Template or Editing a Document (Document Editor)
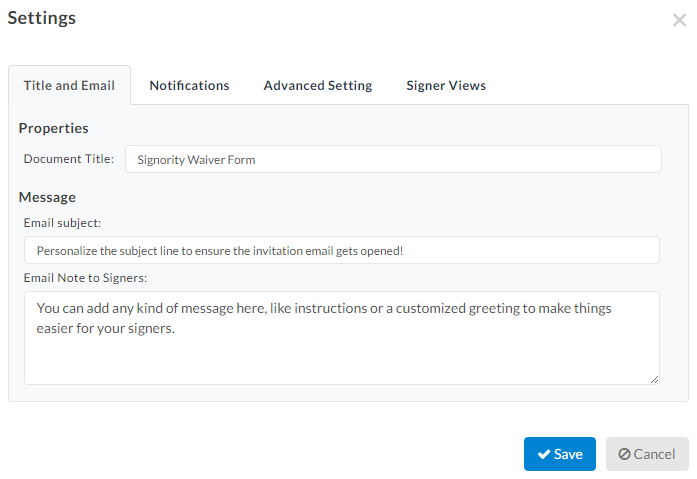
- On the Editor, click Edit next to Settings in the left panel.
- You will be brought to the Title and Email tab of the document settings.
- Update the subject line or message, then click Save .

What the Invitation Email Will Look Like
General invitation email (custom message for all signers)
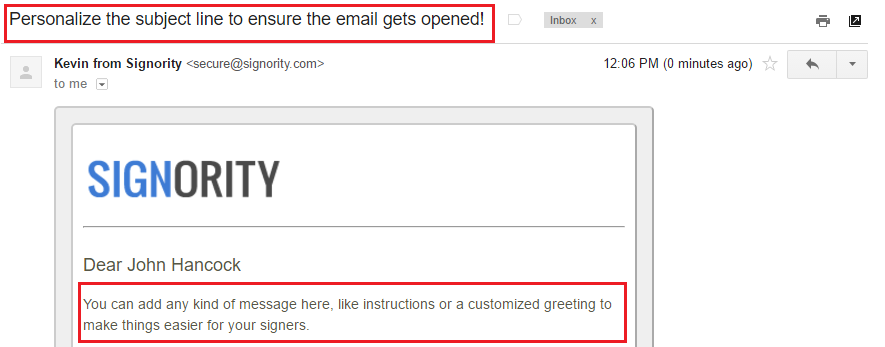
Note the personalized subject line and the content of the email note.
Further Readings
Setting Up Automated Reminders and Notifications
Custom Company Branding for Your Invitation Emails and Signing Page
Streamline Documents by Creating Templates