
Bulk Sign is a Signority feature that lets you send a document for electronic signature to up to 200 recipients at once. Configure a Bulk Sign template once, and a copy will be sent to each person for signing automatically. Each document you send through Bulk Sign will show up in your document list, so you can track the progress for each recipient.
 Creating a Bulk Send document is the same as
creating a Document for electronic signature, except that you'll add recipients very differently. Like the other template options, you will be taken directly to the
Editor page. For this workflow, you will need:


Creating Bulk Send Documents for Signing
To create a Bulk Sign template, click +New and then New Template. When prompted, select the Bulk Sign option.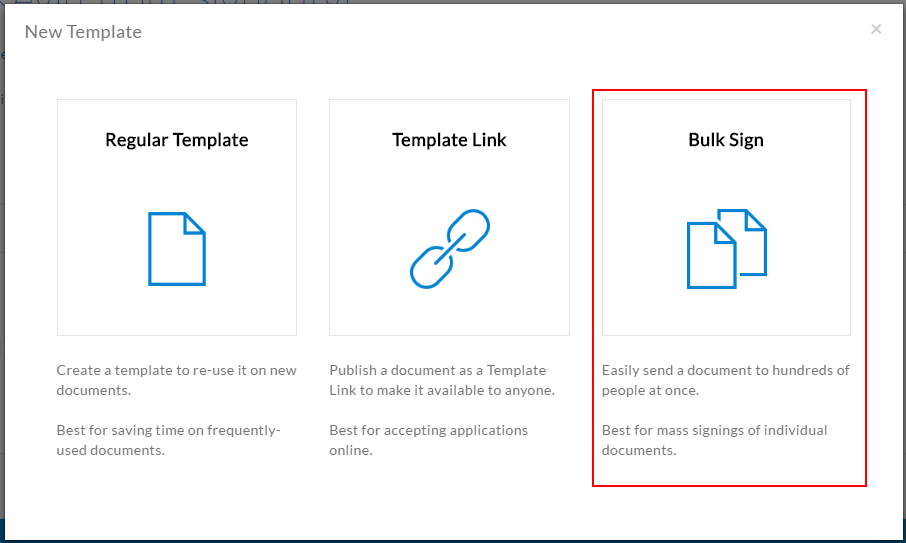 Creating a Bulk Send document is the same as
creating a Document for electronic signature, except that you'll add recipients very differently. Like the other template options, you will be taken directly to the
Editor page. For this workflow, you will need:
- A CSV file to import your signer list
- The names and emails of all of your signers
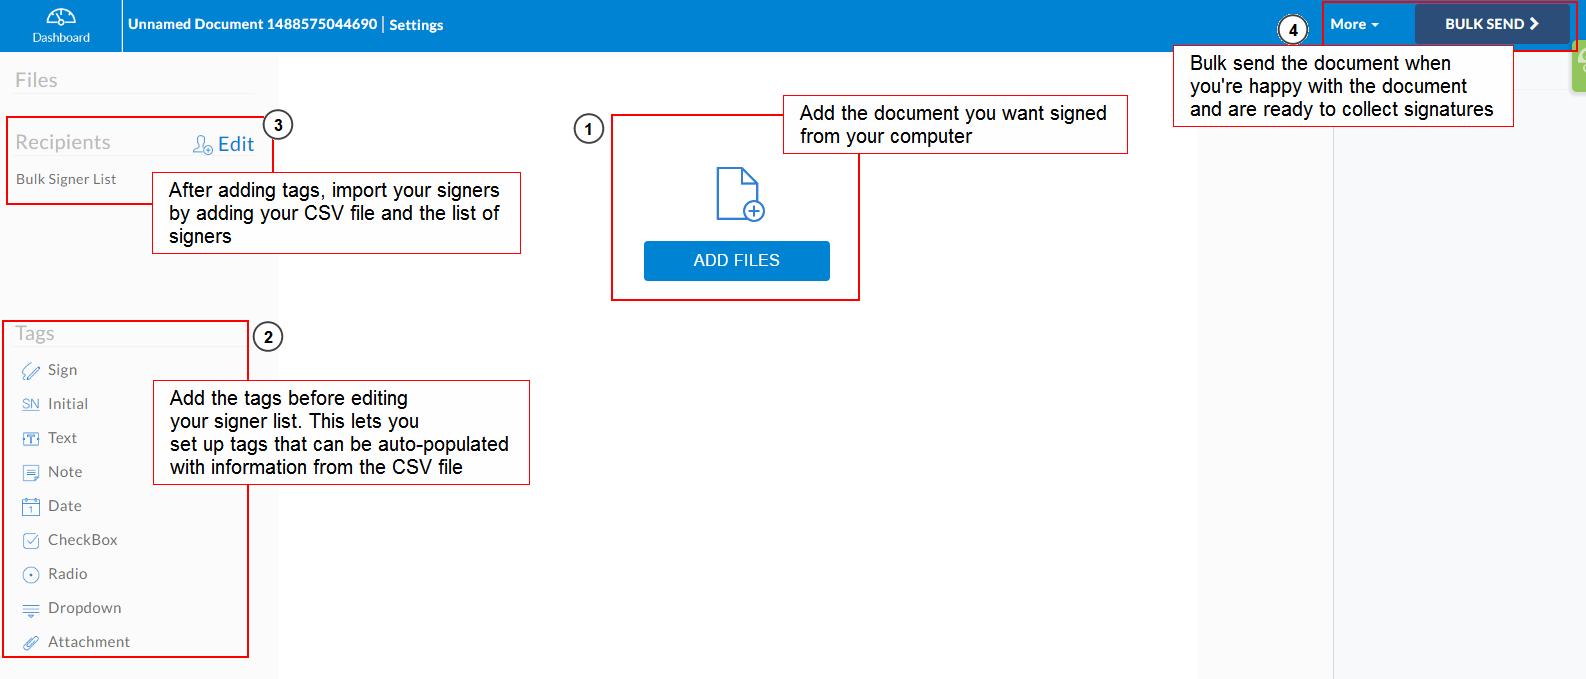
- Use the Add Files button to upload the document you want to bulk send for signatures.
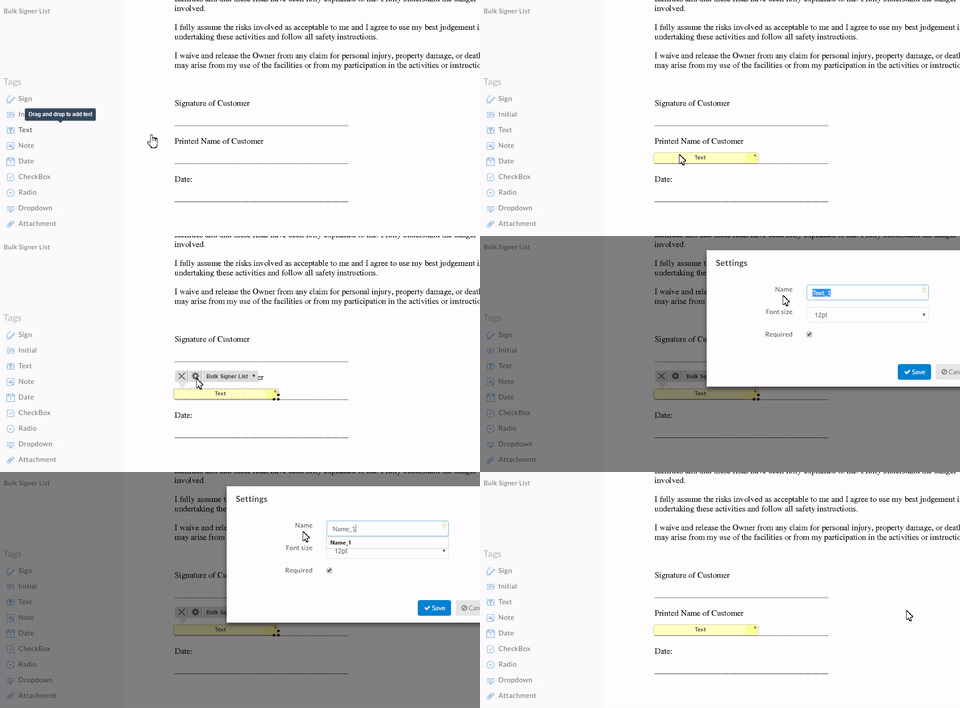
- Unlike Templates and Template Links, with Bulk Sign documents, you'll want to add the tags first. This is so you can pre-populate text tags from the CSV file listing your signers. Drag and drop the tags meant for the bulk signers and then open the tag settings using the cog icon above a selected tag. When you open the settings, change the name to something easily recognizable, like Name_1 or Position_1, for e.g.
Autofilling Tags with CSV Data
You can automatically pre-fill document fields for each recipient by adding extra columns to your Bulk Sign CSV file beyond the required Name and Email columns. For example, to autofill a name field for each recipient:- Place a Text Tag on the name field.
- Open the tag settings and rename the tag to something descriptive, such as Name_1.
- In your CSV file, add a new column whose header exactly matches the tag name (for example, Name_1).
- Enter the appropriate value for each recipient in that column.
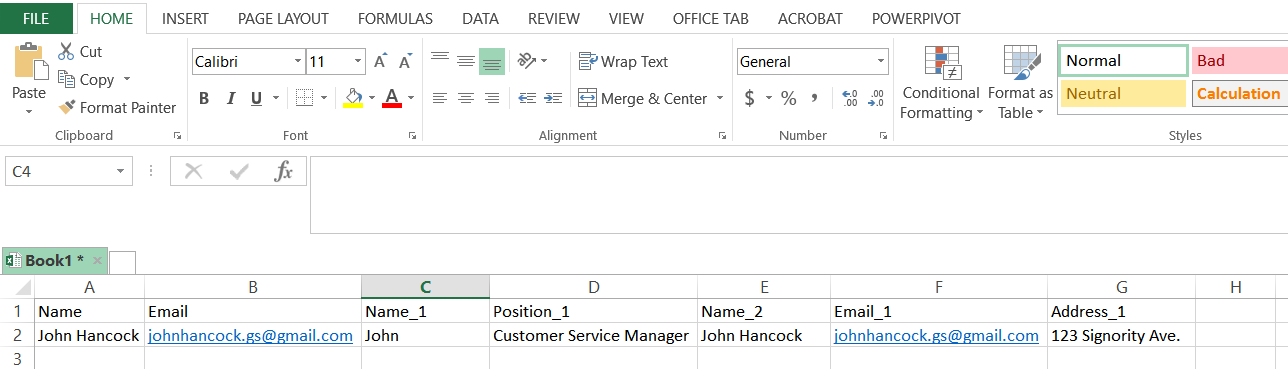
- Once your tags are in place and renamed, create your CSV signer list using Google Sheets or Microsoft Excel. In the first row (the header row), add Name, Email, and any tag names that you want to pre-populate. Then in the following rows, enter the signer information. The name and email are the only columns that are mandatory. The example below gives you an idea of what can be done with the Bulk Sign CSV file.
- Once you're finished constructing your signers list, click on Edit next to recipients in the Editor and when prompted, import the CSV file to your Bulk Signer List recipient by using the Import Bulk List button and selecting the CSV from your computer.
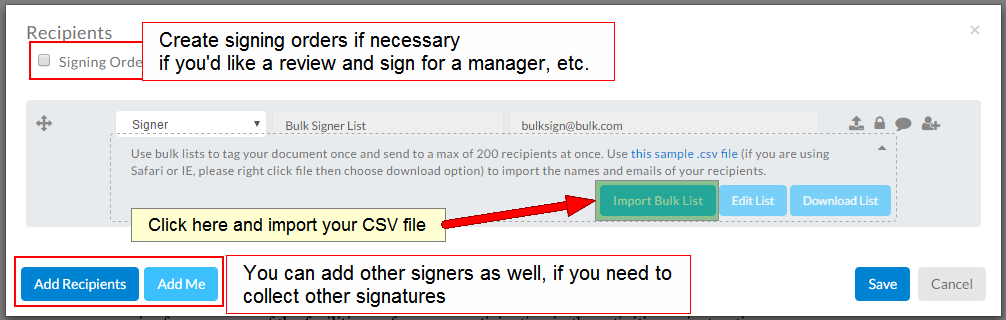
- Once the CSV is imported, you'll see a second window with the signer information plus any pre-populated tags you want for them. You can edit any of the information by simply selecting it in the window. When you're finished click the Finish Import button and then Save.

- When you're finished adding your signers, you can finally send off the document by selecting the Bulk Send document in the top right. Just review the document first before sending, and make sure that everything is correct and to your liking!

Frequently Asked Questions
How many recipients can I send a Bulk Sign document to?You can send a Bulk Sign document to up to 200 recipients at one time.
What information is required in the Bulk Sign CSV file?Only two columns are required: Name and Email. All other columns are optional and are used to pre-populate autofill tags on the document.
Can I edit signer information after importing the CSV?Yes. After importing the CSV, a review window lets you click on any entry to edit it before finalising the import.
How do I track whether each recipient has signed?Each document sent via Bulk Sign appears individually on the Documents page, where you can monitor the signing status of every recipient.